How to Create Realistic Neon Effects in Affinity Designer
- Isabel

- Nov 26, 2020
- 7 min read
Updated: Apr 13, 2022
One element that we can find around often in modern illustration, is the neon glow effect. It is appealing, we all are familiar with it and adds a nice spot for illustrations in which it might not even be the central element.
Let's see how to create this effect playing with several effects to achieve the best result possible for a digitally drawn neon sign.
* Tip : I highly recommend to start out with a reference image or sketch and if you are totally new to this, to follow along with this example. Think of this article as a learning exercise, material to learn. Once you understand the technique, you can try out different subjects for your artwork.
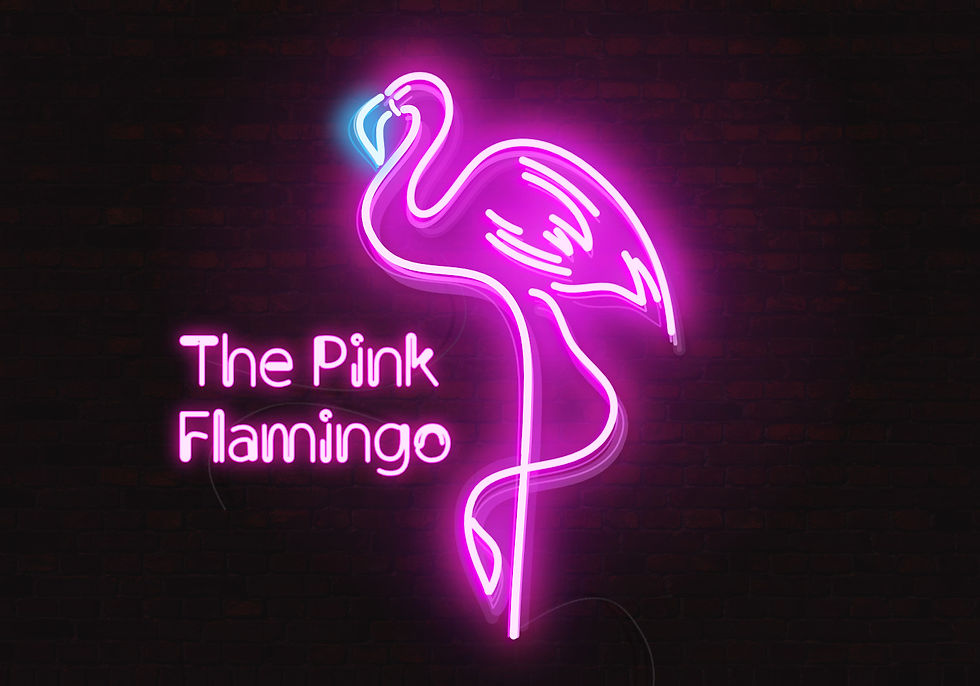
This is the final artwork we are going to create:

Final artwork (Click to enlarge)
You can also join us in the illustration help group here
For my reference, I've used a real neon sign and added some extra elements to it, like a background and text neon lights.

1. Create a Background
Use the rectangle tool and apply a Radial gradient to it. Something like what you see in the image below. Once you have it, lock the layer so it won't move while you work.

Background (Click to enlarge)
2. Draw your Subject
In this artwork, the main subject matter is a flamingo that I've drawn with the Pencil tool. That obviously is not the case for the text part.
The pencil tool is going to allow for smooth loose drawing and will be certainly much faster than using the Pen tool. Look at the lines that form the flamingo and if you go for something that is more than text neon sign, grab your Pencil tool to draw.
It is also convenient that you activate (if unchecked) the Stabiliser option found in the contextual upper menu for the Pencil tool to help you drawing smoother lines. If you are not familiar with using this feature, simply trace some lines on your canvas until you understand what it can do for you. You'll see the difference using it quickly.
One convenient characteristic about this feature is that it allows to use the Pencil tool to draw with a mouse. Note that using the Pencil tool to draw with a mouse without this option activated will most likely produce wonkier lines.
One important thing when drawing with vectors is keeping the number of nodes low.
In the image below you can see an example of what I mean. The less the better, and even in this case I present, I think they could still be reduced, but let's not get overly mental over this now. Simply try to remember and apply this.
The important thing now is that you draw something that looks loose, with confident lines and keeping the number of nodes low.

Paths' nodes (Click to enlarge)
What you should have now is something like this:

Basic paths (Click to enlarge)
You can see that I have traced standalone paths for many different parts of the body, I have also grouped the body parts together and left the beak out on its own.
* Tip Grouping them will allow me to apply the same effect to all the parts in just one go, instead of applying it to each of the parts. This is very convenient if we want to make future changes but also to "turn OFF" the lights if needed with just one click.
Then I have applied a colour to all paths:
The colour for the body paths is: #FFE5FD
The colour for the beak path is: #E5F7FF
* Tip : Keep the number of colours in your neon artwork low. Using more colours than needed, will result in a not so nice result once we "turn on" the lights. Think in terms of 1 to a maximum of 3 colours ideally.
3. Let's Turn the Lights ON (a bit for now)
The next step is going to be selecting the group we have created for the body part of the flamingo (or the main part in your own artwork), and apply some effects to it.
I could do this later on, maybe after step 4 but, being a bit impatient myself, I know I prefer to start giving my eyes some rewards to start seeing where I am going.
This is a crucial part to get right, because usually, wrong values in the effects, even if by small numbers, can potentially change the overall final effect.
In this case I have applied the following:
1/ Outer Shadow Colour: #FF18FF

(Click to enlarge)
2/ Outer Glow Colour: #FF18B5

(Click to enlarge)
3/ Inner Glow Colour: #EB00FF

(Click to enlarge)
For the beak I have taken a different approach. I could have done the same, this is, applying effects from the Effects panel. But as I was working I could see that this other option was better for my beak, or at least, I liked it better because applying an automatic glow was resulting in some of this glowing light mixing with the flamingo's body glow.
Also, and since as of today, stacking the same effect more than once is not possible I was not satisfied with the overall result the automatic effects were able to do. Mainly, this is because I wanted it to be brighter, and none of the blending modes was as powerful in brightness as the solution I found.
For this, I have duplicated the beak shape and applied a blue colour to it (#3ECBFF) plus a gaussian blur of 10,7px.

Beak effects (Click to enlarge)
4. Adding Depth to the Sign
Now that I have this, I want to give a bit of depth to my Flamingo neon sign. This is something that will clearly make it look more realistic, since we are working in 2D, but we want things not to look flat, but apply a bit of depth to them, like it'd be in real life.
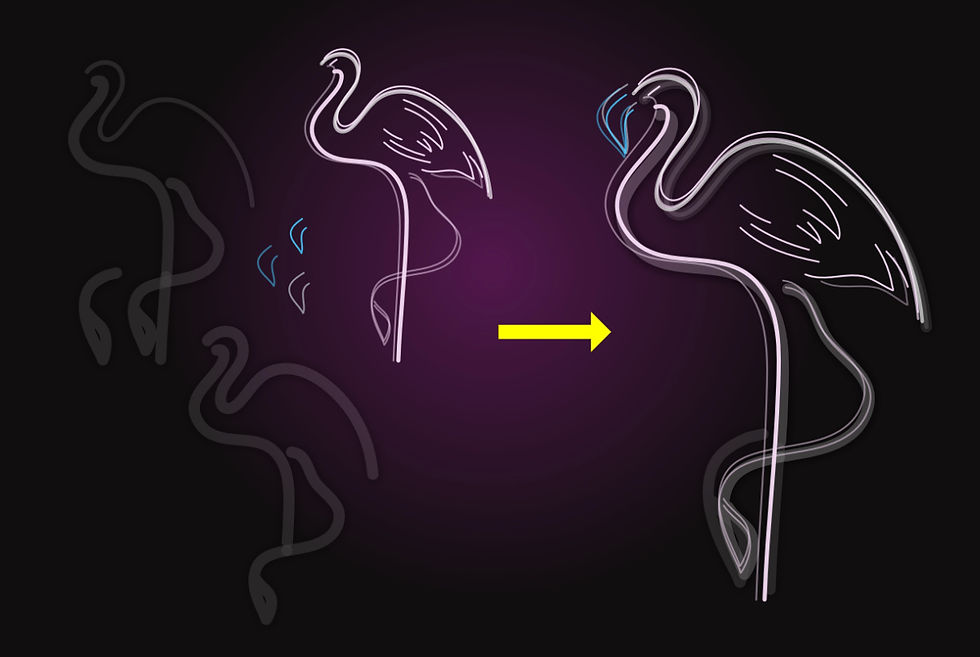
So for this, I have switched OFF the light effects applied until now, duplicated the whole flamingo including the beak 3 times more (some of the parts even 4 times) and applied different blending modes and widths to each of the paths, in such a way the whole looks like there's tubes and a structure behind the main neon tube.
You can download here the source file for this particular part where you can explore better the effects applied to the paths to achieve this effect.

Back structure paths with different widths, opacities and blending modes. The paths on the left have been reduced in size to make them fit on the image. (Click to enlarge)
Place these paths behind the initial flamingo shape and "turn ON" the lights again (turn on the effects you initially applied in the effects panel).
By now, you should have something like this:

Back structure placed behind the flamingo (Click to enlarge)
5. Applying the Rest of Lighting Effects
Now we need to enhance the neon light effects so it will glow in all of its neon glory.
Duplicate the main initial lines you created for the flamingo for both body and beak.
Remove any effects they have applied. apart from what we have created before. You should have and additional group that looks something like this:

Initial flamingo lines we will use to enhance the neon light effect (Click to enlarge)
Next, with both body and beak grouped on this latter shape, apply the following effects to the new duplicated shape:
Gaussian blur: 23px
And an outer glow like in the image below:

(Click to enlarge)
Group it if you still haven't and place this new blurred shape behind the main group like you see in the image below step by step.

Main Shape + Blurred out main shape = Result (Click to enlarge)
6. Creating a Background Context
So now that we have the whole neon flamingo lightened up, we need to give it a little bit of context. Place it in the center of your canvas and you can now add a wall behind it.
I have chosen a brick wall to put behind. You can find and download a good image for you to use here: https://unsplash.com/s/photos/brick-wall
Resize it to make it fit within your canvas, making sure your briks are not too big or too small in relationship with the flamingo or whatever you are drawing for your sign, place it right above the background in the layers panel and give it a transparency of about 10% and apply a a Vivid light blending mode to it.

(Click to enlarge)
7. Creating the Neon Cables
In order for the whole artwork to look more like a real neon would, we are going to add some additional elements: cables.
These cables will be connecting the flamingo and a final text sign I will add later.
For this, the only thing you need is tracing a path and give it as much style as you want. In my case, I have drawn 3 cables with a a curved path, so they don't look too stiff and straight.
A path with a grey colour and a bit of noise will do. Then, I have duplicated it and offsetting it from the other one, I have changed the colour to almost black and applied a little bit of gaussian blur (0,9px).
With this, I have the cable and its casted shadow. Like this:

(Click to enlarge)
8. Creating the Text Sign
Most neon signs are accompanied by a text announcing something, be it a bar, a beer, a motel, whatever!
So let's add a bit of text to spice things up some more.
I have used a font that works well with the neon tube style, so if you want to use the same one as I used, you can download it for free here: https://www.dafont.com/clip.font
I have written "The Pink Flamingo" in a format that fits weel with the overall shape of the famingo, and added some effects:
Outer shadow colour: #FF18FF

Outer glow colour: #FF18B5

Inner glow colour: #FF00FF

Once all this effects are applied, I duplicate the text so it glows even more.
Finally, to give it even more intensity, I duplicate the text again and apply a gaussian blur (42px). Then I also duplicate this layer but make it a 50% opacity.
And we are done! the final artwork looks now like this:

(Click to enlarge)
9. Conclusion
Creating neon signs is something many of us like. We are all used to see them and many of us feel attracted by the glowing light and colourful announcements.
It is an element that we can find in contemporaneous artwork done by artists and illustrators and it is relatively simple to recreate in digital artowrk. If there's something I've learnt while creating them is that a small amount of this or that effect, can make a big difference and that, placing your neon sign in context will help too.
By switching on an off the light effects, and some additional tweaks to colour, we can easily create an animation that will make for a real cool realistic neon sign. Some final fine-tuning, i.e. leaving one of the letters on your text or artwork unlighted, as if it has been blown out or has broken will provide it with an even more fun and appealing look.
I have quickly created an example for you to see, using this online gif maker tool: https://ezgif.com/maker

I'd love to see what you create! Remember to join us in the Facebook help group if you want to share your artwork or ask for help solving your doubts.
Thanks for reading!


